If you’re up for a true bucket list hike, Mulhacen, Spain is your peak! Being the highest mountain in Sierra Nevada, the second highest peak in Spain, the highest in mainland Spain, as well as the Iberian Peninsula, there is no doubt it’s worth the climb. This is one of the best hikes in southern Spain!
You can easily do a Mulhacen hiking trip in a day, but for the adventure seeker, there are various refuges to stay at and wild camp opportunities to consider.
You have several options for your Mulhacen hike and this is a guide for both a day hike and multiple two-day Mulhacen trekking experiences. Get ready for the best hike in Sierra Nevada.
Disclosure: This post may contain affiliate links. That means that if you make a purchase through one of those links, I will get a small commission at no extra cost to you. As an Amazon Associate, I earn from qualifying purchases.
I’m Linn Haglund, the face behind Andalucia Hiking. I’m an avid hiker and after calling Andalucia home for over 10 years, I’ve covered my share of peaks, ravines, rivers, and valleys across all 8 provinces. I’m here to help you navigate this incredible region with thorough hiking guides, hiking tips, and gear recommendations.
Table of Contents
Hiking Mulhacen in one day
The one-day Mulhacen hike is fairly easy in summer with the park shuttle bus. However, the last section can feel tough due to the altitude, especially if you come straight from the coast in the morning.
My feet felt like they were pulled to the ground and I could hardly lift them, though climbing Mulhacen in two days and sleeping at around 3000 meters of altitude didn’t give that sensation at all.
The one day Mulhacen hiking trail starts and ends at Mirador de Trevelez (Alto del Chorillo) at 2700 meters of altitude, which you can reach by a park shuttle bus from Capileira. This is one of the most popular treks in Granada.
Practical information
- Province: Granada
- Mountain range: Sierra Nevada
- Length: 11,5 km
- Time: 4-6 hours
- Altitude: 3479 masl
- Elevation: 779 m
- Route: Linear return
- Difficulty: Medium
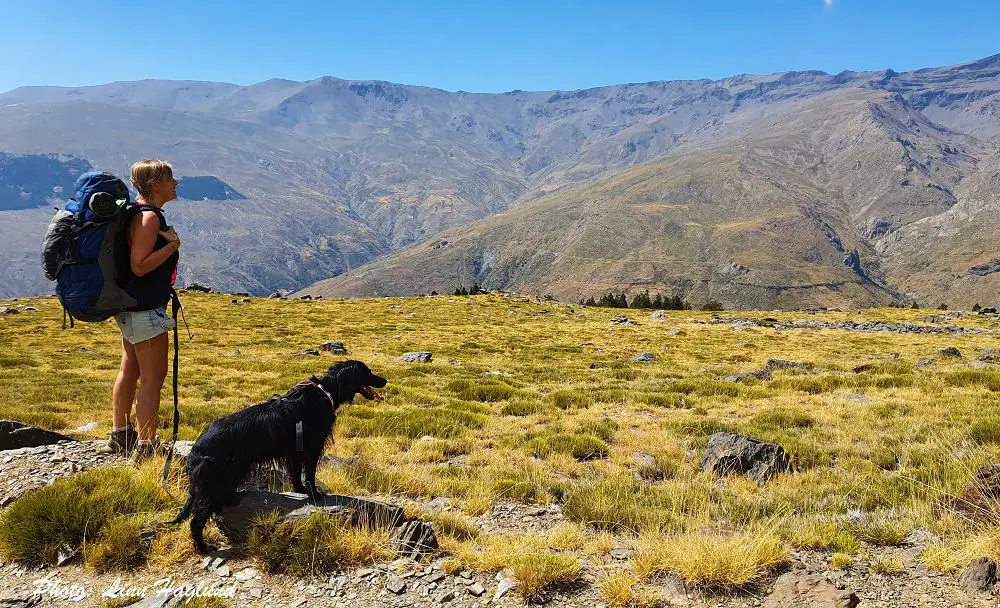
- Hiking with dogs: Allowed in aleash. Dogs have to sit in a cage in the luggage department of the shuttle bus up to the trailhead. There are no natural water sources on this hike, so make sure you bring enough water for your dog too. You can read everything you need to know about hiking with dogs here.
How to get to Mirador de Trevelez
The trailhead for the one day Mount Mulacen hiking trip starts at Mirador de Trevelez, also known as Alto del Chorillo. This is the highest point any vehicle can go, but not any vehicle.
Private cars are not allowed, so you need to take the park shuttle bus from the village of Capileira. Unless you want to walk that stretch up and down from the village, which will easily add 4-6 hours to your hiking itinerary.
The park bus has to be booked in advance and only runs in the summer months. However, if the weather conditions don’t permit it, the bus won’t leave, so I recommend that you always call or write in advance to make sure it hasn’t been canceled.
You can find updated contact information for booking bus tickets to Mirador de Trevelez here.
Unfortunately, the information is only in Spanish, but the phone number, email, and opening hours are easy to spot under the header: Servicio de Interpretación de Altas Cumbres – Vertiente Sur.
The park bus takes about 45 minutes from Capileira to Mirador de Trevelez where it will pick you up exactly 6 hours after drop off. There is a live guide on the bus that gives information about Sierra Nevada and the protected area during the bus ride.
How to get to Capileira
You can get to Capileira village either by bus or by car. However, the bus takes a long time and you might have to stay the night in Capileira before and after your hike. By car, you can make it a day trip from either Granada or Malaga.
By bus
Bus from Granada to Capileira takes 2-2,5 hours, but there are only a few departures a day. The same goes for the return. You can check bus times and prices on ALSA.
Bus from Malaga to Capileira takes from 4 hours 15 minutes, with a bus change in Granada.
By car
It’s definitely easier to get to Capileira by car, no matter where you travel from.
From Granada to Capileira, it takes less than 1 hour 30 minutes by car.
From Malaga to Capileira it takes about 2 hours driving the A7 along the coast taking off above Motril towards Capileira.
It’s easy to find Capileira with the GPS, so you shouldn’t get lost. Parking in Capileira is easy along the road as long as you come early and it’s for free.
What to bring when hiking Mulhacen in one day
Though this is a fairly easy hike in one day, you are hiking at above 3000 meters of altitude and the weather conditions can change quickly even if you go hiking in the summer.
After all, you’re heading to the highest mountain in Sierra Nevada and the whole of mainland Spain!
For this reason, make sure you check the weather forecast as late as the same morning hour for hour to have an idea of the temperatures and wind strength you might encounter.
I usually search for “weather Capileira” and “weather Mulhacen” (or swap weather for “el tiempo” in Spanish for more results) to get an idea of the weather both at the lower altitude and at the top where it’s likely coldest and windiest. The more weather sites you check, the more prepared you’ll be.
Whatever the weather forecast says, though, make sure you have the necessary layers of clothes with you. It’s not always accurate, no matter how close in time you check it. I have hiked this trail both in shorts and in long pants in summer.
Good footwear is also important for this hike, whether you wear hiking boots or hiking shoes.
If you struggle with knee pain, trekking poles or a hiking knee brace is a good idea for this hike. You can also read my complete list of useful hiking gear here.
Read my complete guide to finding the best sustainable day hiking backpacks here.
Here are the minimum of things you should bring for a one-day Mulhacen hike:
- water
- windbreaker
- caps/hat
- lunch
- snacks (fruit/nuts, etc)
- sunscreen
- neck gaiter/buff
- camera
- portable mobile charger
Mount Mulhacen: hiking in one day
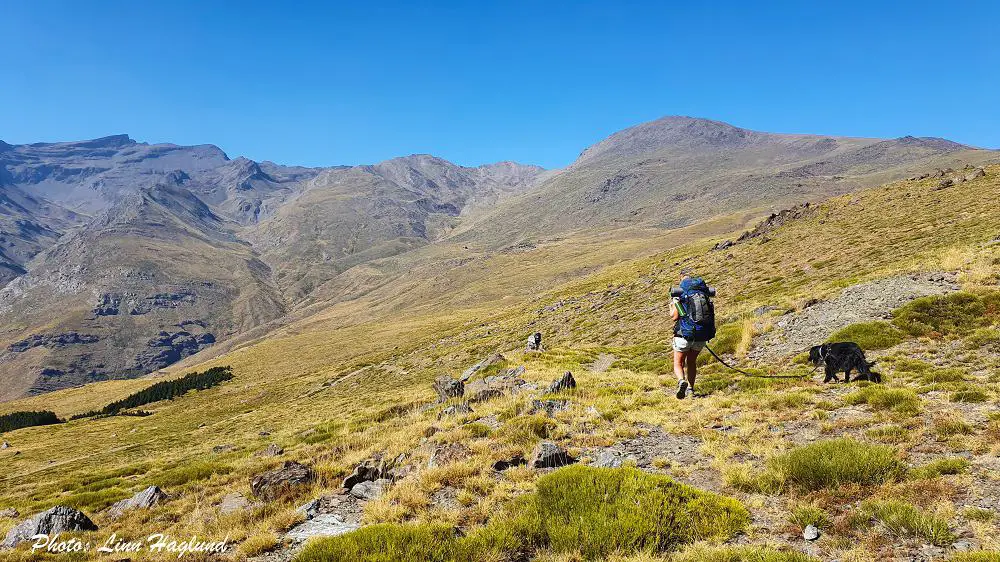
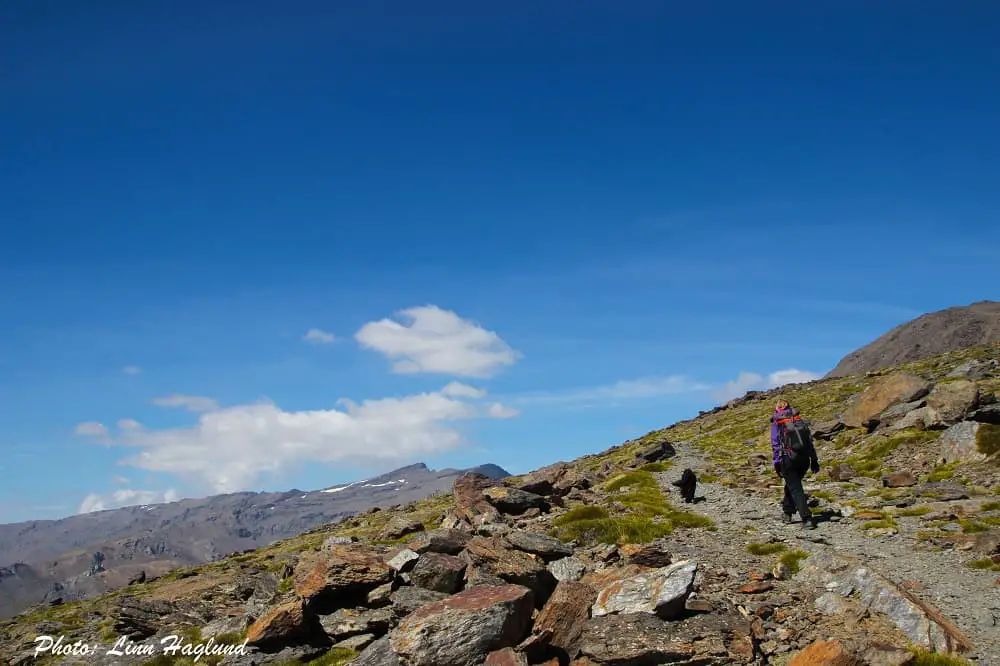
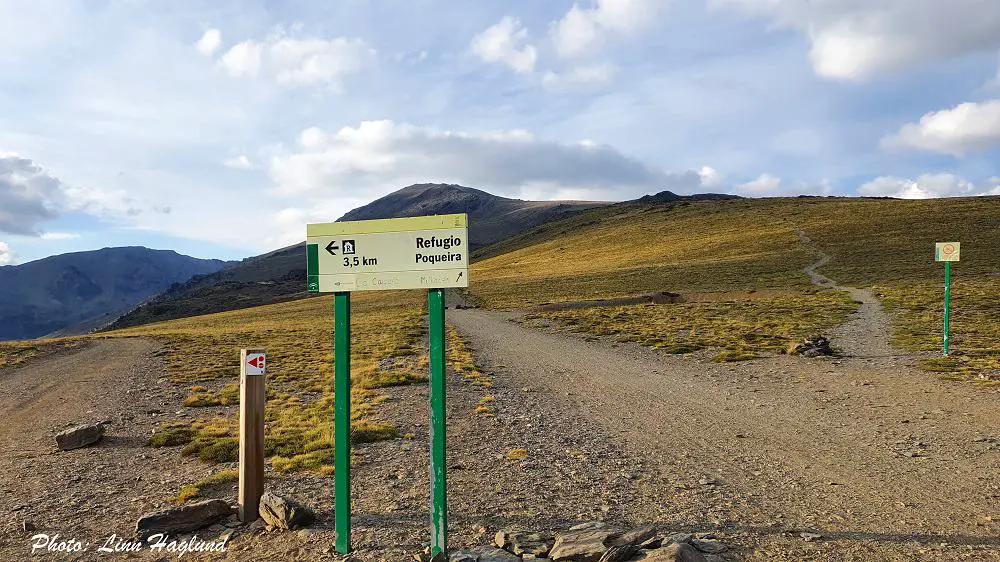
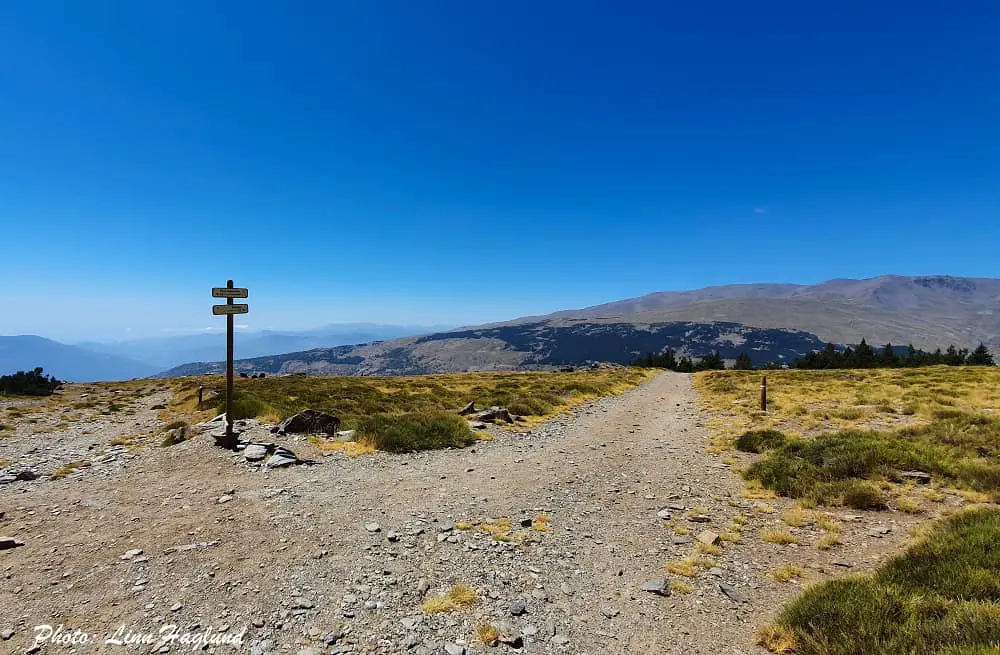
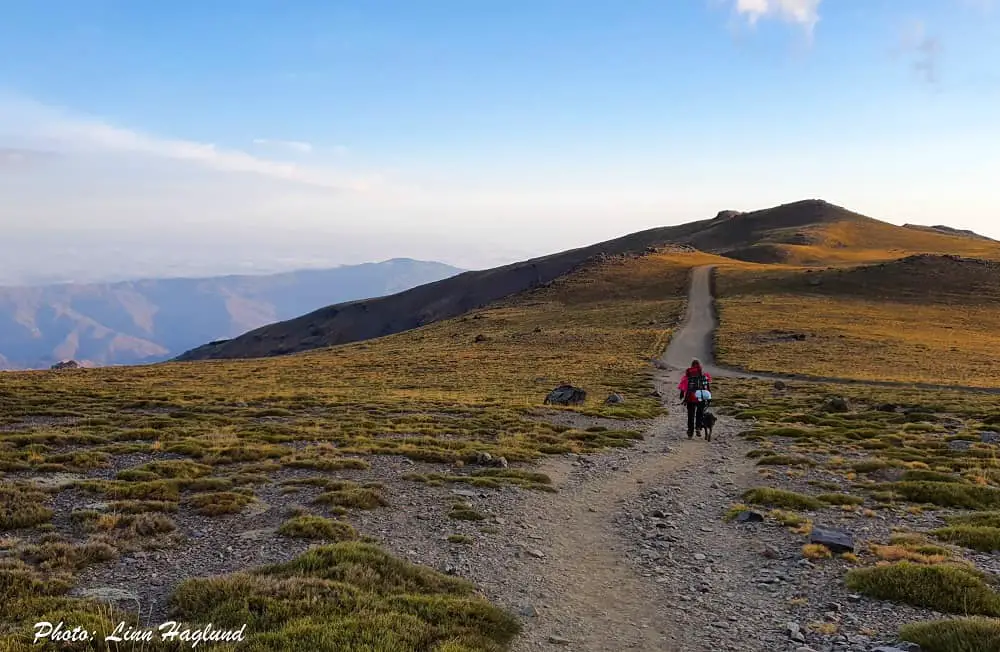
The actual hike from Mirador de Trevelez to Pico Mulhacen is fairly easy and the path is easy to follow. Starting by following the broad dirt track you come with the bus for the first couple of kilometers, until you get to a junction.
Here you’ll see a sign to Refugio de Poqueira to the left. You need to take the path to the right, which is the one you keep following until the top.
The last part is a bit rockier, though still easy to follow. You might notice the altitude once you get higher if you’ve traveled straight from the coast in the morning. I definitely felt it in my legs and could hardly lift them – so heavy. Other than that, I had no issues.
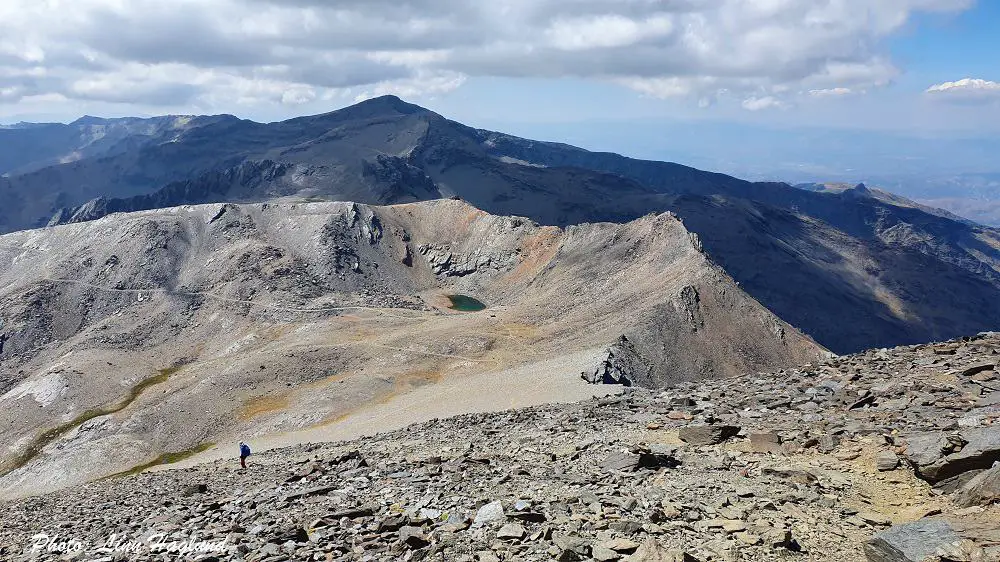
Once you get to the top and the path continues on the ridge towards the right, there are only a few hundred meters left to the top of Pico Mulhacen.
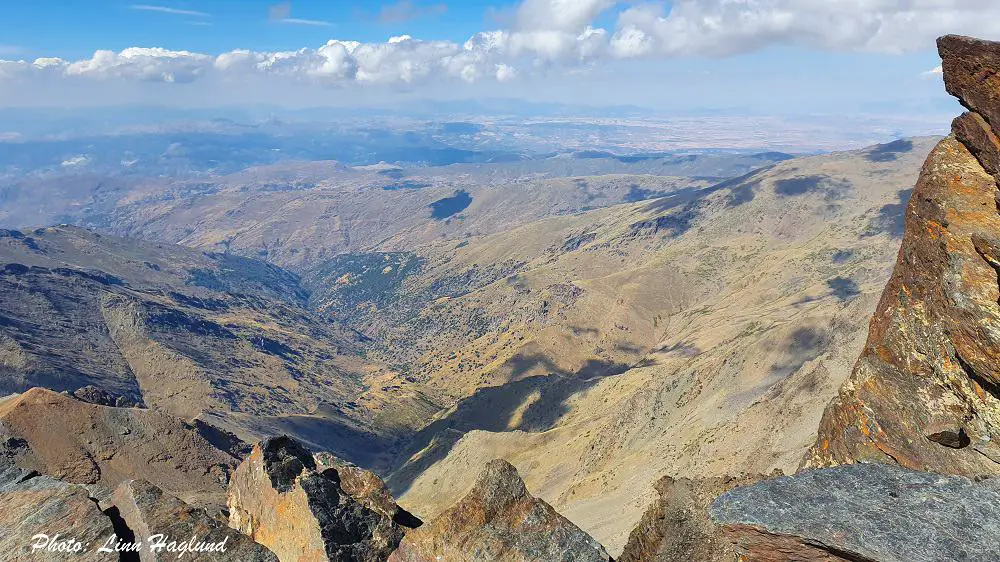
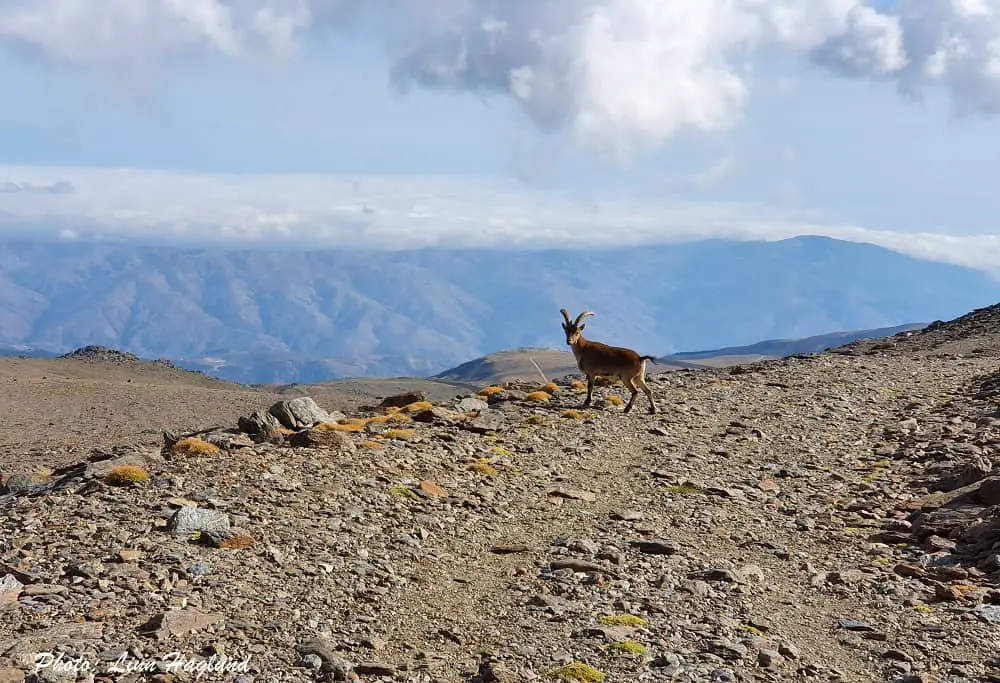
From the top, you can see all the 3000-meter peaks like Pico de Veleta (3398m), which is the second highest in Sierra Nevada, and Alcazaba (3369m), the 3rd highest in the national park, but also El Chullo peak (2613m), which is the highest in Almeria’s Sierra Nevada.
On a clear day, you can see the Mediterranean coast as well as Malaga’s highest peak, La Maroma (2066m).
After you’ve taken in the mesmerizing views of the surrounding peaks, return the same way back to the bus. You should leave the top at least 2 hours before the bus picks you up.
ALTERNATIVE ROUTE BACK: You can also make it a round trip by taking the steep trail down to the right when leaving Mulhacen Peak. When you reach the bottom and reach a wide path, take a left to round Mulhacen and it takes you straight to where the bus goes.
What to bring when trekking Mulhacen in 2 days
Before looking at the different 2-day treks to Mulhacen, here is what to pack, no matter which route you choose.
Trekking Mulhacen in two days means you need a bit more hiking gear, including provision for two days.
There are natural water sources on all these routes, but when hiking down Mulhacen to Mirador de Trevelez (Alto del Chorillo) and further down to Capileira, there are no water sources, so if you hike back down that way, make sure you’ve filled up with enough water for the return.
I’ve used both a Steripen and a Lifestraw squeeze bottle for filtering water while hiking in Sierra Nevada and they’ve both been lightweight, super easy, and safe to use. If I’m gonna choose one, I’d pick the Lifestraw squeeze bottle as you can fill it up too and have it hanging on the backpack.
These hikes are also heavy on your knees, so if you tend to notice pain on long hikes, make sure you bring knee support.
Lightweight or even ultralight trekking poles are also recommended here so you don’t carry too much weight, but the support is definitely useful.
Depending on whether you sleep in the guarded or unguarded shelters or if you opt for wild camping, you need different things for the night.
Refugio de Poqueira (temporarily closed for renovation) sells single-use sheets, so I recommend bringing your own for the sake of the environment.
The unguarded refuges don’t have any accessories, so you’ll need everything you bring tenting except the actual tent.
Nights can get pretty cold. A tip I got from a fellow hiker before I went on the first two-day trek was to bring an emergency blanket for the cold night (we had below zero and I only had a summer sleeping bag.) It worked wonders.
So, on cold nights, I wrap myself in the emergency blanket before slipping into the sleeping bag and it’s sooo nice and warm! Obviously with good layers of warm clothes on too.
What to bring when hiking Mulhacen in 2 days:
- water
- water purifier
- food (think lightweight energy-filled food)
- windbreaker
- neck gaiter/buff
- hat/beanie
- gloves
- thermal underwear
- warm socks
- first aid kit
- tent (if you opt for wild camping)
- sheet (if you stay at Refugio de Poqueira)
- sleeping pad
- sleeping bag
- headlamp
- cooking stove and utensils
- portable charger for your phone
Climbing Mulhacen in two days from Hoya del Portillo
There are various options to climb Mulhacen in two days. I’ll start with the route from Hoya del Portillo, which is the highest you can get by private vehicle and requires that you have your own car.
You can walk from Capileira to Hoya del Portillo, but that will add at least 4-5 hours return.

Practical information
- Province: Granada
- Mountain range: Sierra Nevada
- Length: 24,5 km
- Time day 1: 3-6 hours
- Time day 2: 6-9 hours
- Altitude: 3479 masl
- Elevation: 1334 m
- Route: Circular
- Difficulty: Moderate to demanding
- Hiking with dogs: Allowed on a leash. I recommend paw balm or paw socks on the two-day trek. There are also limited natural water resources and none on the loop down again from Mulhacen on day two. So make sure you bring enough water for the dogs too, and fill up in the morning on day two so you have enough for the rest of the day. Here is everything you need to know about hiking with dogs.
How to get to Hoya del Portillo
The only way you can reach Hoya del Portillo is by car, or as mentioned above, on foot. As the highest point you can get by private car, Hoya del Portillo is at an altitude of 2145 meters.
It’s easily reached by driving through Capileira and continuing up the dirt trail. By plotting it into the GPS, it might try to get you up a shortcut where you’ll easily see that you can’t get up by car, so just keep following the dirt road your on and the GPS will redirect quickly.
The drive takes less than 30 minutes and the track is in good shape for a regular car to drive on. Once you get to a roadblock, that’s where you have to park and the trail starts to the left of the roadblock. There is space for quite a few cars, though I do recommend you get there pretty early, especially on weekends.
Note that the road has been in good shape whenever I’ve been there, but heavy rain can change that, so if it hasn’t been maintained after heavy rainfall, you might encounter it in worse shape than I have.
Day one – Hoya del Portillo to Refugio de Poqueira/Refugio Caldera
Once you’ve parked at Hoya del Portillo, you need to take the path going upwards through the forest beside the stone hut. This means, if you stand on the dirt road looking at the road barrier, you turn left (upwards and not down).
The forest trail opens up after about half an hour and shortly after that, you get to a junction where you continue straight ahead towards Poqueira. If you want, you can do a detour a few minutes to the right to a viewpoint and back.
After the junction, the trail follows open areas and eventually it passes a lot of livestock, constantly accompanied by the picturesque 3000-meter peaks on your left side.
Keep following this trail (there is a path to the right a bit down the road – don’t follow it) until it descends towards a farmhouse and you get to a junction where you get onto a wide dirt road.
Take the left here and keep going – the farmhouse will stay on your left as the road continues past it towards the right – until you get to Refugio de Poqueira.
You’re now at 2500 meters of altitude and at the first accommodation option. If you’re not staying here for the night, keep walking straight past it until you get to the river. The trail follows the river. There are a few nice, flat spots to set up your tent crossing the river.
Alternatively, you can keep hiking up for another hour or so past a couple of steep ascents before you get to a junction, looking up the steep west flank of Mount Mulhacen. A couple of hundred meters to your left, you’ll see the humble Refugio Caldera.
Read more about where to stay below so you can choose the right accommodation for you.
Where to stay
There are a few options on where to stay on your way up to the mighty Mount Mulhacen, depending on your preferences.
Note that the guarded refuge, Refugio de Poqueira, doesn’t allow dogs and they were pretty unpleasant to me on the phone when they pointed out that I couldn’t expect to use their toilets either.
Note that the park rules say that you can’t set up a tent closer than 500 meters from a guarded refuge.
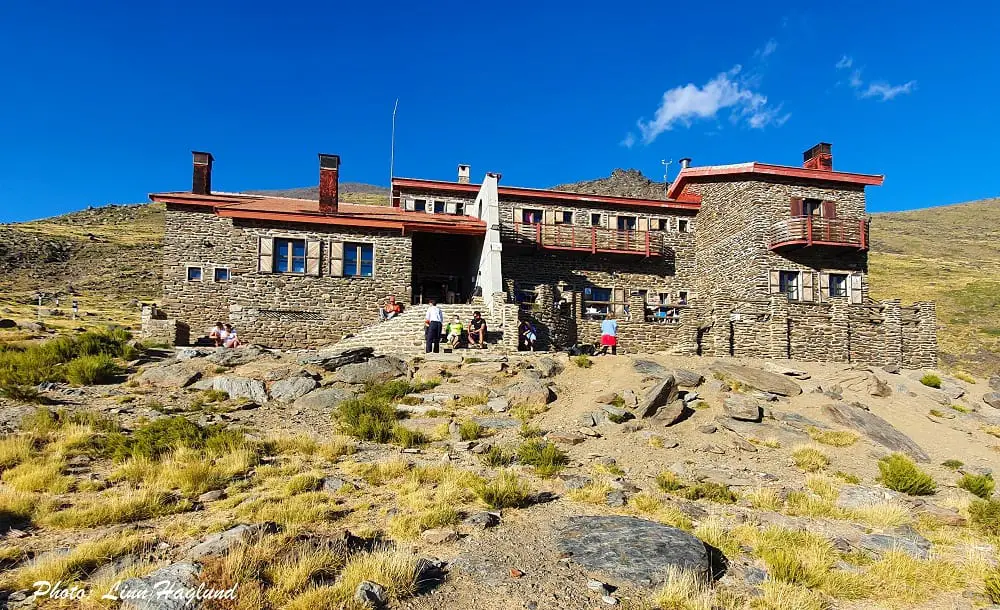
Refugio de Poqueira
Refugio de Poqueira is temporarily closed for renovation (still in October 2024)
Refugio de Poqueira is the only guarded refuge along this hiking route to Mulhacen. They have a cafe and restaurant so you don’t have to carry as much food as if you choose any of the other options.
You need to bring your own sheet to the refuge, though, or you can buy a single-use one. I recommend that you bring your own, even though it’s extra weight (think what you save in food, cooking gear, and tent!), the environment will thank you.
You find prices and other relevant information on their website here.
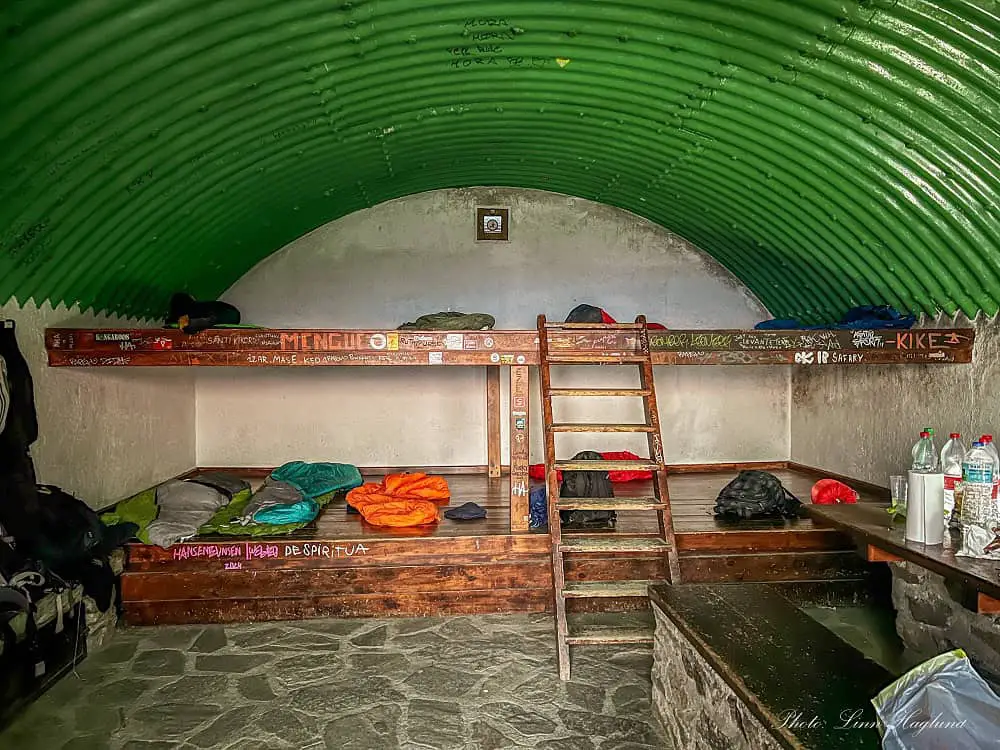
Refugio Caldera
Refugio Caldera is situated right below the last, steep climb up Mulhacen’s west ridge at 3050 meters of altitude.
Walking up along the river from Refugio de Poqueira, it probably takes an hour or so to reach. You’ll see the little stone shelter to the left when you reach a junction where you can turn left or right – or continue straight up Mulhacen’s steep west ridge.
This refuge is free and fits about 10-12 people. It gets full pretty fast in the summer and it’s recommended to get there as early as possible to secure a place. Even after summer, I’ve stopped by to make food and the shelter has been half-full around 16:00 already.
If you sleep in Refugio Caldera, there is a direct path up to Mulhacen, which is easier to walk than if you come from Refugio de Poqueira as it’s not so steep straight up.
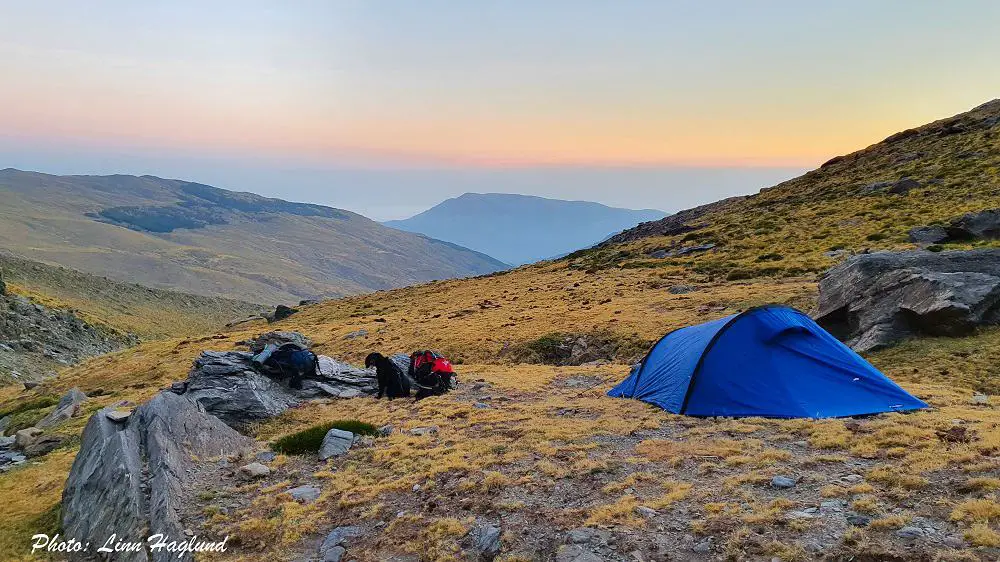
Wild camping
Wild camping in Sierra Nevada National Park is allowed as long as you notify the national park authorities.
I had a difficult time finding the right phone number and the right email address the first time, but after being in touch with different offices, I finally got a response at the following email address (yes – it’s loooong):
pnsierranevada.usopublico.dtgr.cagpds@juntadeandalucia.es
They will provide you with a form that you need to print out, fill out, and send back. If you don’t have a printer, you can go to a Papeleria store and they can print it out for you. Once you’ve filled out the form, take a picture with your phone and email it back.
ISIDER TIP!
Every time I’ve emailed them the form, I get an autoresponse back that the file is too big and their inbox can’t receive it. The trick is to resize the image to a small size (800px wide has worked for me).
The last time I didn’t have access to a computer, so I sent the image to myself on Messenger and saved it from there. Messenger compresses images to a small enough size apparently, because it worked!
They will also email you all the things you need to know about wild camping in the national park, like leave no trace, where you can and cannot set up your tent, and how to protect your food at night.
If the above-provided email address doesn’t work, they will be able to help you at the tourist office in Capileira – you can also call them, but I’m not sure how well they speak English.
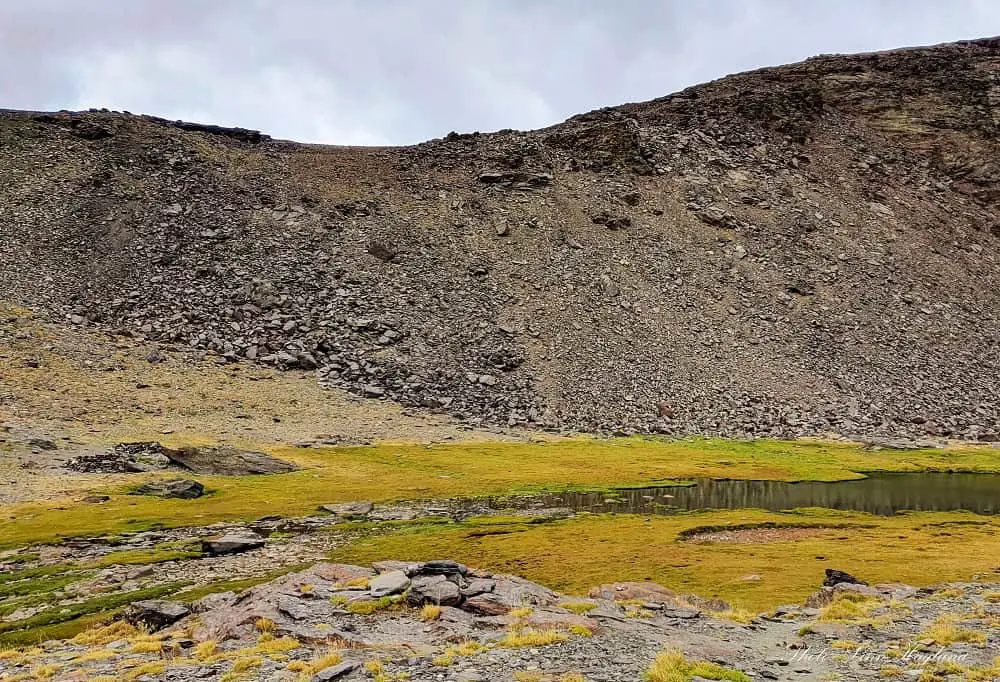
We camped on the left side of the river (we crossed it) a good walk past Refugio de Poqueira. Further up, there are some spots around the lagoons below Refugio Caldera.
You can read my complete guide to wild camping in Sierra Nevada here.
Day two – Refugio Caldera – Mulhacen – Hoya del Portillo
Day two of the Mulhacen hike from Hoya del Portillo is the hardest, especially if you’re carrying your camping gear.
Depending on where you’ve slept, if you start by following the river from Refugio de Poqueira or if you stay at Refugio Caldera or camp in between, the toughest stretch comes after you get to the junction (before turning left towards Refugio Caldera).
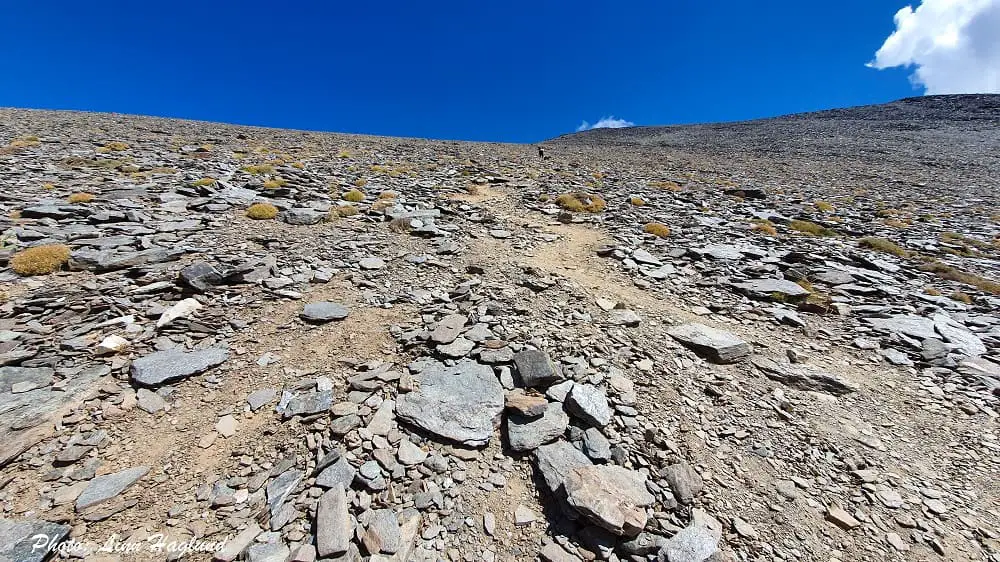
You’re going straight up the steep, seemingly endless hill. You’re heading up Mulhacen’s west flank. It’s unforgiving, steep, and consists mainly of loose rock, so watch your step.
Walking from Refugio Caldera is a lot easier, though it’s a bit longer, but it’s far from as steep! Trust me, I’ve done both.
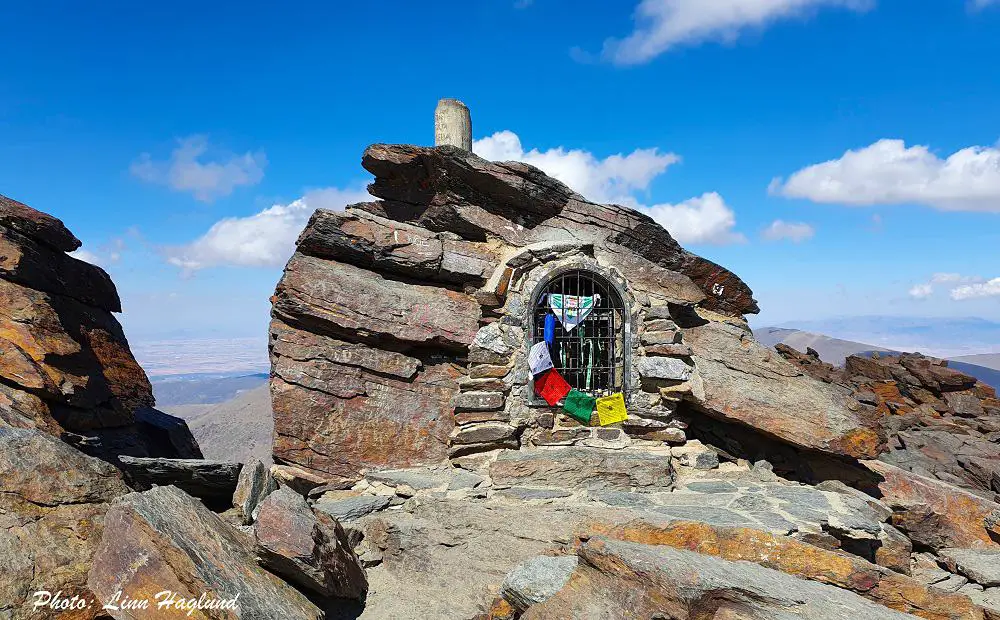
Once you’ve reached its top, you see Mulhacen Peak about 50 meters to your left. You’re finally there!
After taking in the breathtaking views of the surroundings, walk back down the same first 50 meters from the peak where you came from.
But instead of turning right to return back down the west flank, keep going straight along the ridge on the path in front of you.
Continue for a few hundred meters before the trail starts winding down towards the left.
If you struggle with knee pain after the ascent, you can opt for the longer route instead, by taking the wider track down, as it’s not as steep.
This track will be visible to your left before you start the descent on the actual trail. It will eventually meet up with the trail, but it’s way longer!
If you opt for the actual trail, just keep walking past the wide track and follow the cairns down towards the left and you won’t get lost.
The path is well marked with cairns, easy to follow, and continues zig-zagging through the rocky landscape for a while before it turns greener and you eventually get onto a dirt road.
Keep walking straight on this. You’ll soon enough get to a junction where there are signs to Poqueira to the right, but you just keep walking straight. This is the same road where the park bus drives day hikers.
Eventually, you’ll get to Hoya del Portillo. The descent from the peak to the car takes around 3-4 hours with breaks.
Hiking Pico Mulhacen 2 days from Trevelez
Another beautiful trek to Mulhacen is from Trevelez past Siete Lagunas. You can do it in one day, but the trail up to Siete Lagunas is very strenuous and most people (including myself) prefer to sleep at Siete Lagunas either on the way up or down.
It’s possible to make this hike as a round trip, but I’ve never done it and am not quite sure of the alternative descent, so I’ll stick to the trails I know.
Practical information
- Province: Granada
- Mountain range: Sierra Nevada
- Length: 23,5 km
- Time day 1: 3-6 hours
- Time day 2: 6-9 hours
- Altitude: 3479 masl
- Elevation: 2000 m
- Route: Linear return
- Difficulty: Moderate to demanding
- Hiking with dogs: Allowed on a leash. I recommend paw balm or paw socks on the two-day trek. Make sure you bring enough water for the dogs too, and fill up at Siete Lagunas as there won’t be any water sources on the rest of the way up to Mulhacen. Here is everything you need to know about hiking with dogs.
How to get to Trevelez
Getting to Trevelez is easiest by car as the buses are very limited. There are free parking spots at the entrance of the village where the car can stay overnight without issues.
By bus, on the other hand, there are only 3 buses a day from Granada with the earliest arriving in Trevelez at 12:55. This means that you’ll get a late start if you travel directly from Granada, yet you’ll have time to reach Siete Lagunas before sunset.
Day one from Trevelez to Siete Lagunas
Trevelez is the highest village in Sierra Nevada, sitting at 1486 meters of altitude. You can start the hike to Mulhacen from the village, but it’s a long hike to do in only a day.
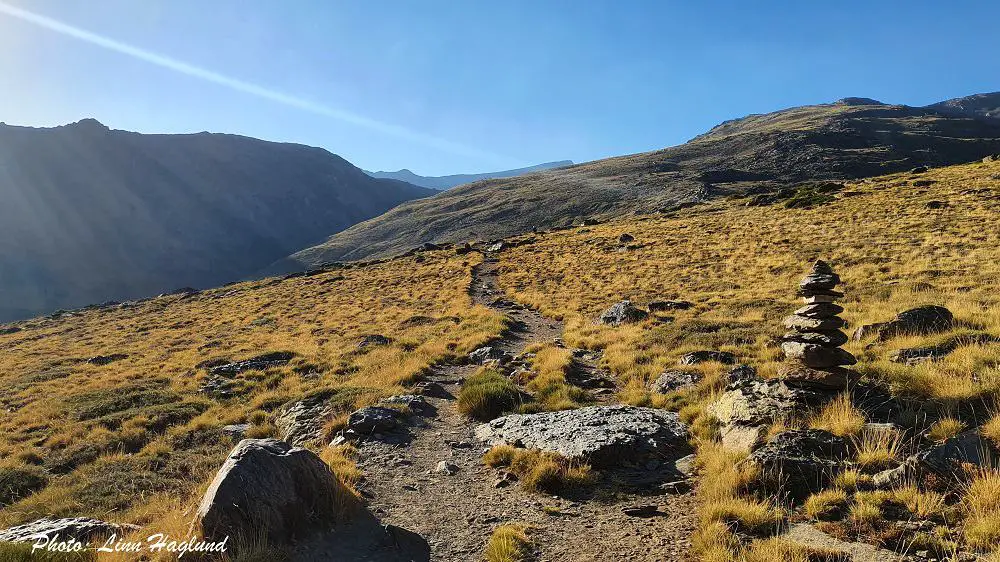
The hike starts at the top of Trevelez village where you’ll see signs to Siete Lagunas. The trail is easy to follow from there and there are no places to get lost.
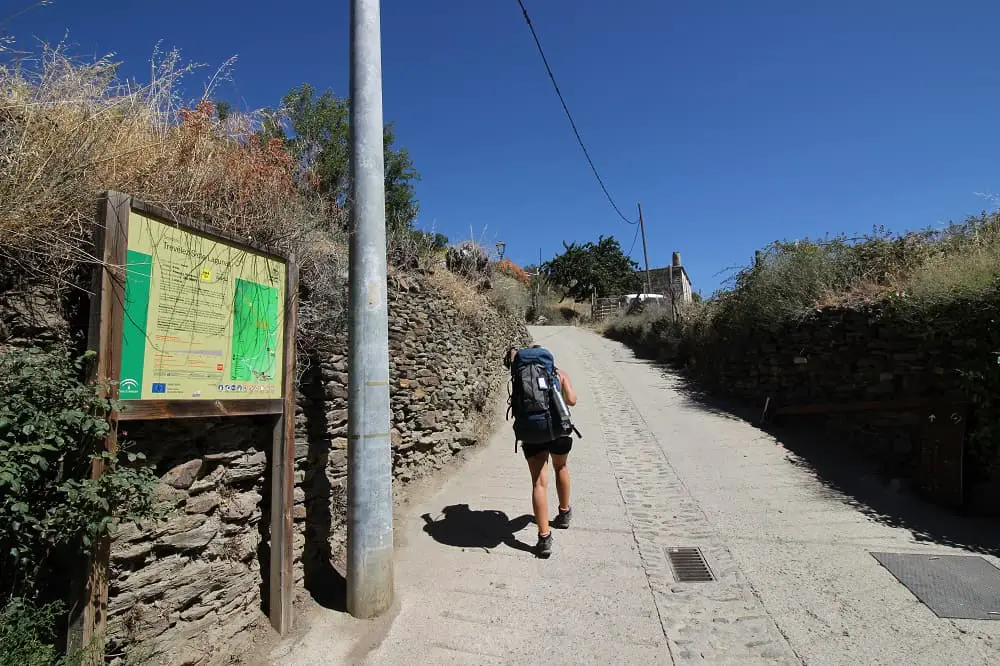
The first bit takes you past farms, but once you pass them, you’ll get to the most beautiful mountainous area where you follow a narrow trail with pretty views all the way to Refugio La Campiñuela.
From there, the trail continues up a bit longer before it joins the river Rio Culo Perro. At one point the path crosses the river and continues up to the waterfall of the same name.
This section is quite steep and the trail divides into several trails – but don’t worry! They all lead up to Siete Lagunas on the top of the waterfalls.
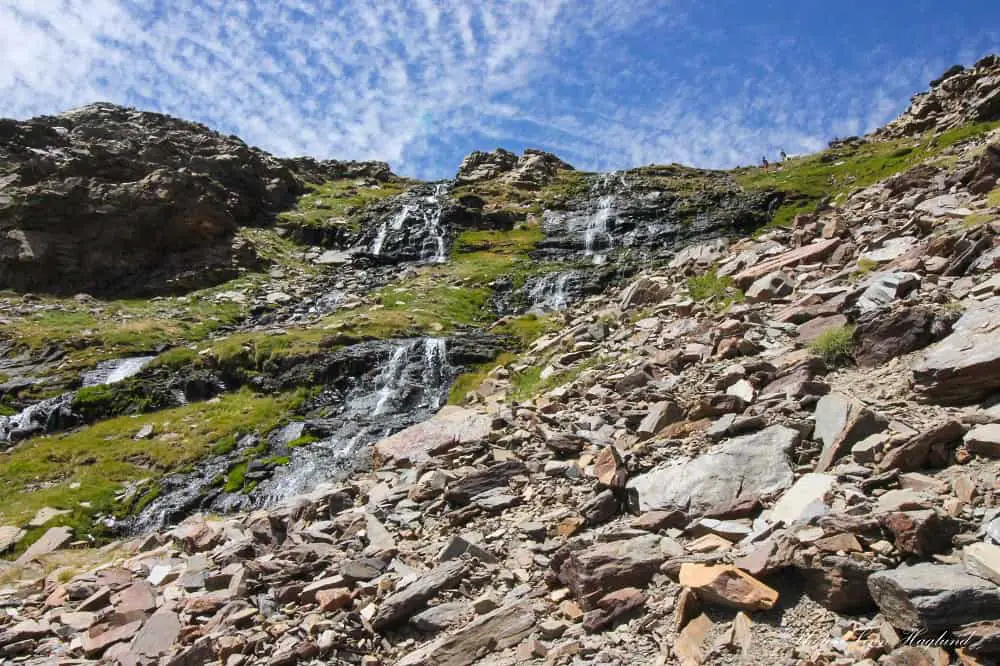
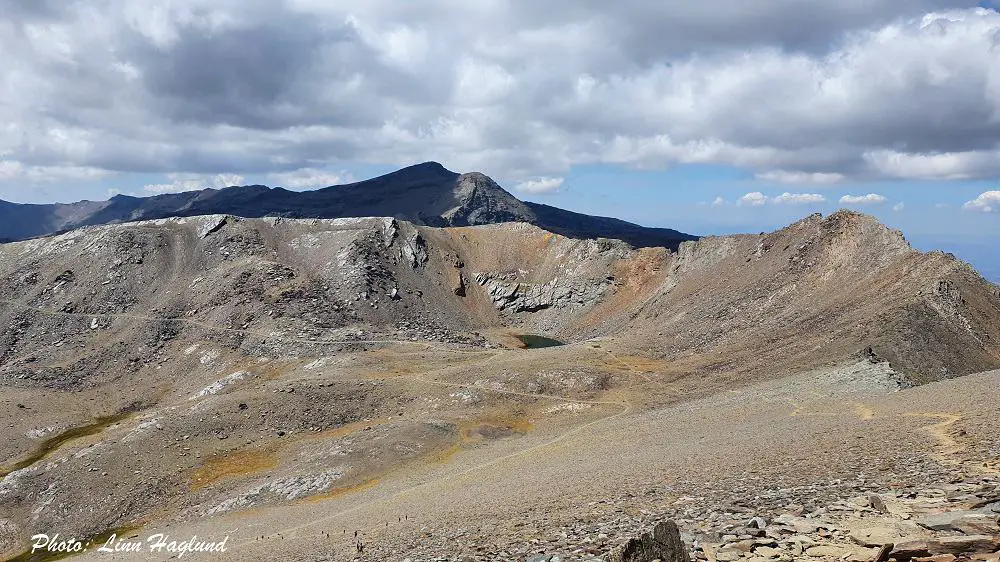
When you reach the top, you’ll be met by vast meadows where there are seven lagoons (though you won’t see them all without walking around. But don’t forget to turn around to take in the views of the mountains behind you!
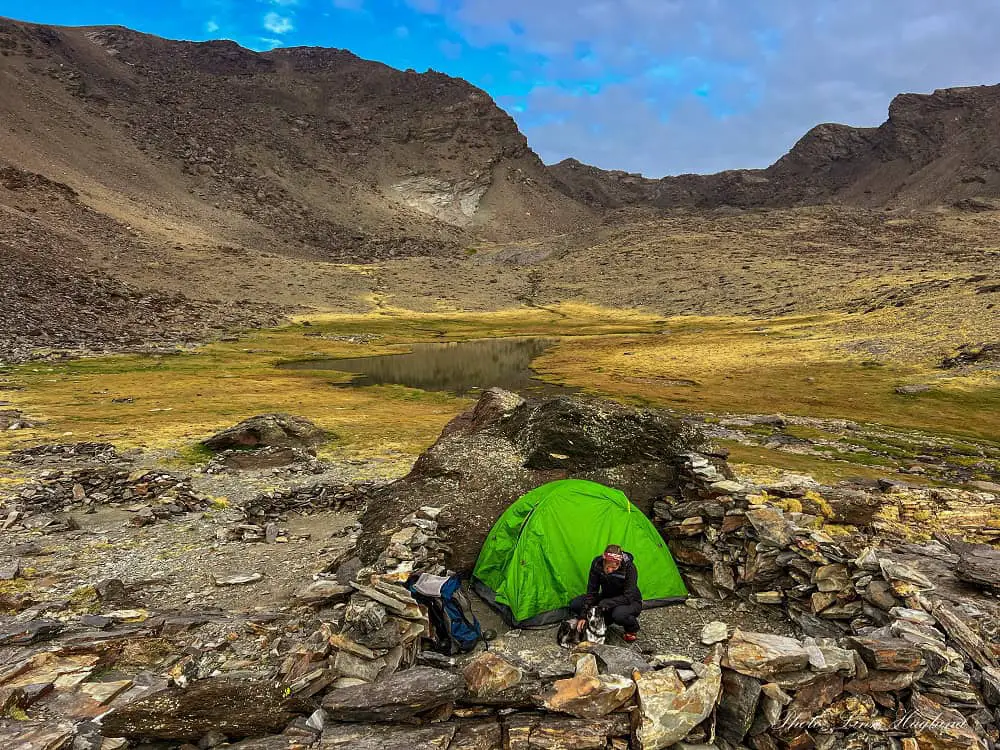
At Siete Lagunas, there are several shelter rings built of stone where you can set up your tent or sleep under the stars if you prefer.
It’s a popular spot to camp, so in summer you´ll most likely not be alone, especially on the weekends. This also means that sometimes all the built shelters are full, but as long as you set up your tent more than 50 meters from the water, you have plenty of space.
To wild camp in Sierra Nevada National Park, you must inform the park authorities upfront and bring the confirmation with you in case park rangers ask for it. Read everything you need to know to wild camp in Sierra Nevada here.
Day Two from Trevelez to Siete Lagunas
Many hikers leave their backpacks at Siete Lagunas to avoid carrying them to Mulhacen and back. I haven’t done it myself, but there are several places you can hide your pack for a few hours for a lighter hike up to the roof of the Iberian Peninsula.
From Siete Lagunas, there are two ways up to Mulhacen, one short and one longer and you could potentially make it a round trip for different views.
Either way, you must hike up a steep trail taking you up from Siete Lagunas to the top of the ridge – on the left side when you have the waterfall behind you and the meadows in front of you.
I find it hard to see the trail before I get closer, so if there aren’t any people walking there making it obvious, I suggest you walk between the stone circles (with the waterfall behind you, it’s the ones on your left) and you’ll find the trail at the end.
When you reach the top, you can walk straight to the right and continue on this trail until you reach Mulhacen.
Alternatively, walk straight and continue until you reach a junction where you walk to the right (same trail as the one-day hike from Alto del Chorillo), this also takes you to Mulhacen, but it’s a little longer.
You could walk one up and the other down if you want.
Hiking Mulhacen in 2 days from Hoya de la Mora
Another beautiful alternative is to hike to Mulhacen from Hoya de la Mora across Pico de Veleta (3398m) or just hike around the peak. But why skip the second highest peak in Sierra Nevada National Park if you walk just a 20-30 minute hike below the peak?
It’s possible to do it on a day hike, but it’s going to be a very long day, starting at the crack of dawn.
Practical information
- Province: Granada
- Mountain range: Sierra Nevada
- Length: 20 km
- Time day 1: 6-8 hours
- Time day 2: 8-10 hours
- Altitude: 3479 masl
- Elevation: 979 m
- Route: Linear return
- Difficulty: Moderate to demanding
- Hiking with dogs: Allowed on a leash. I recommend paw balm or paw socks on the two-day trek. There are a few lakes to fill up water along the way, so make sure you have a filter to purify still water. Here is everything you need to know about hiking with dogs.
How to get to Hoya de la Mora
Getting to Hoya de la Mora is easy by car or by bus. There is an ample parking space where you can leave your car overnight for free (we have left it there for four days before without issues.)
You can plot in “Hoya de la Mora” on the GPS and it takes you straight there.
The only bus from Granada bus station is run by Tocino and takes 55 minutes. There are 3 buses a day in the hiking season (normally from May to November, but they don’t have fixed start and end dates.)
Day one: Hoya de la Mora to Refugio Caldera
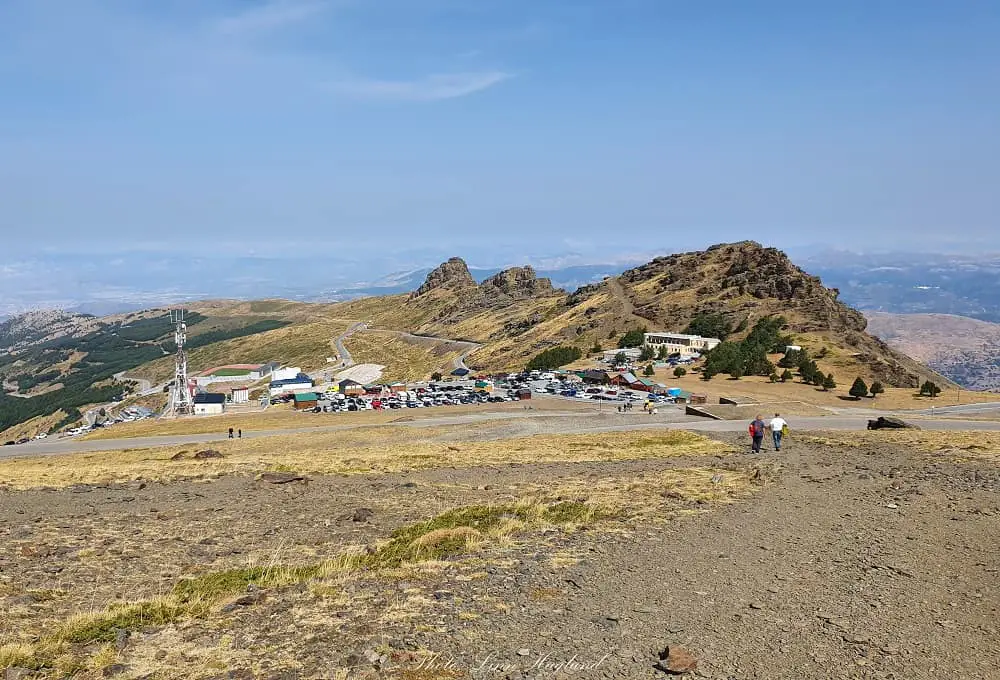
The trailhead starts at the parking in Hoya de la Mora. You can follow the road that zig-zags up but, I prefer to cut it short by following the trail that cuts straight through it.
At one point, you have two trails in front of you. They both go to the same place, so you can choose the one that calls your name.
Once you get close to the Veleta peak on your left, you can either climb the last few hundred meters to conquer it on your way or continue on the dirt trail that forks to the right side to hike directly to Refugio La Caruela.
This is the first place you can potentially sleep, but I recommend continuing past it for another couple of hours until you reach Refugio Caldera at the foothills of Mulhacen.
Staying there makes day two a lot easier as you’ve already shaved off a long stretch the first day.
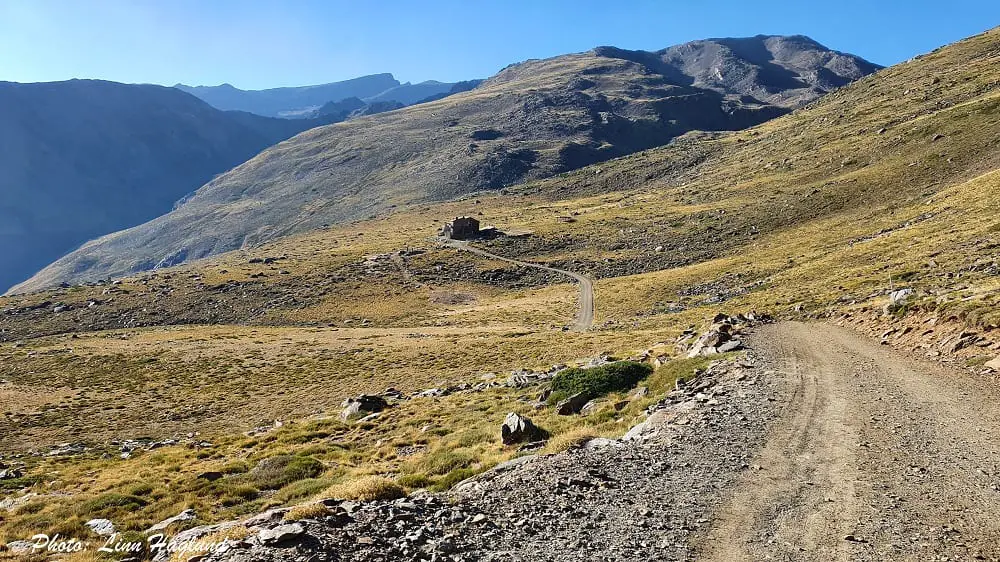
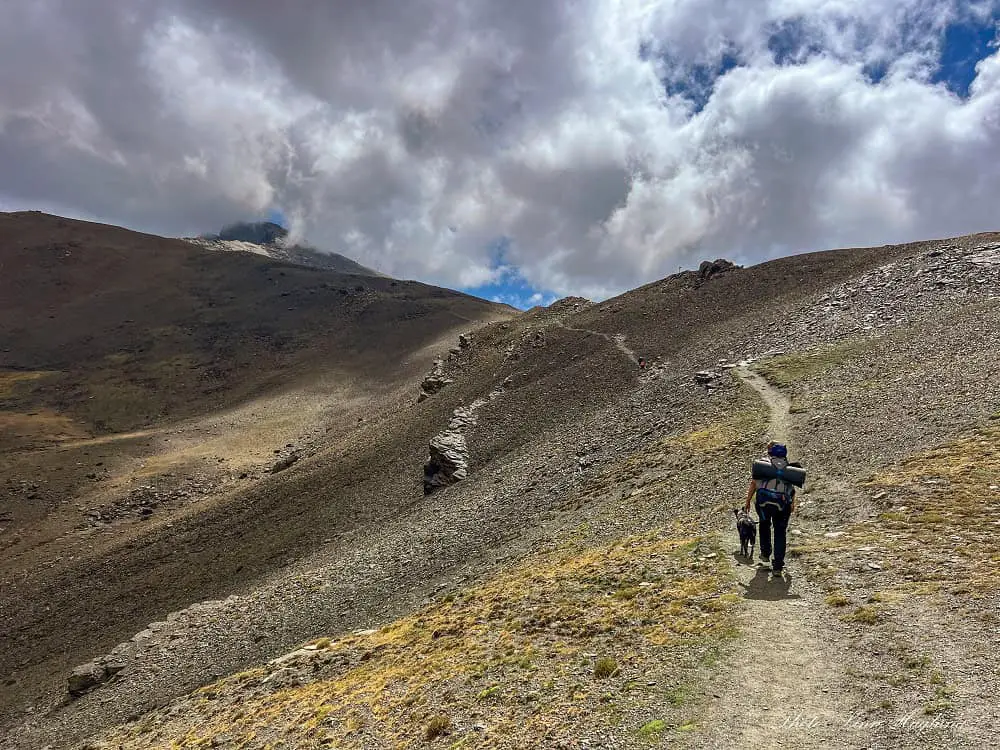
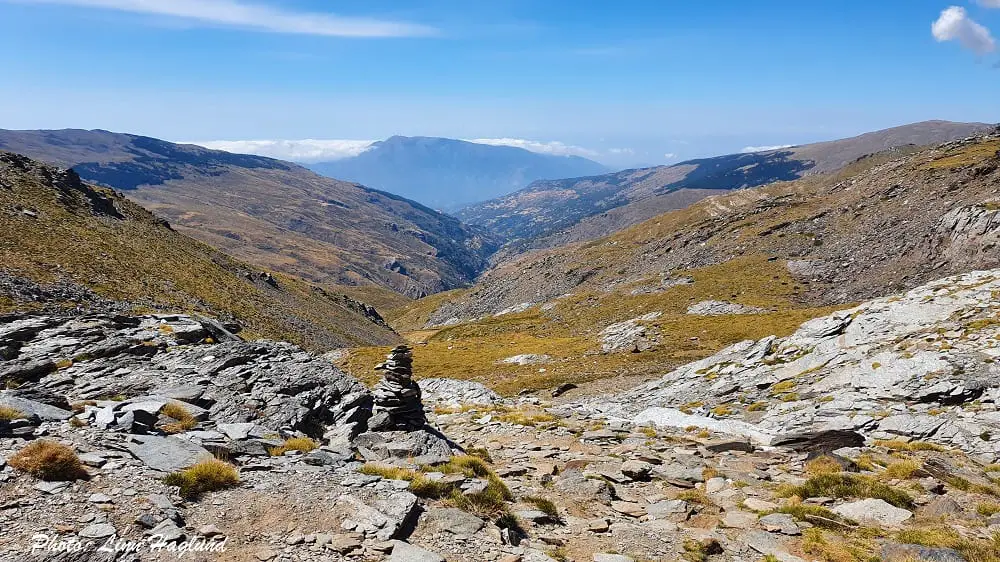
After zig-zagging down from Refugio La Caruela, the path continues on the mountainside for a while before it cuts through the mountain to new lake views.
From there, the wide trail continues all the way around the mountain to Refugio Caldera. We took a shortcut. There is a long straight stretch where you can see another shelter at the end of the road (a left turn). About halfway there, you can take a narrow trail to the left taking you across the hill and down a steep trail cutting straight down to Refugio Caldera.
The picture below is from the top of the hill before descending.
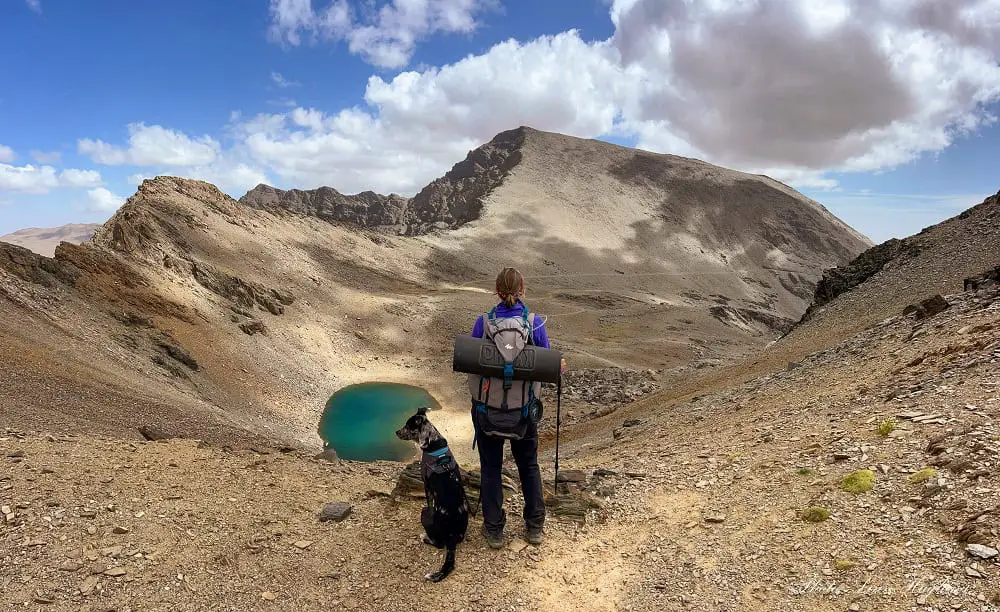
Day two: Refugio Caldera-Mulhacen-Hoya de la Mora
From Refugio Caldera, there is a visible trail that takes you up the rocky west slope of Mulhacen. You should reach the top in one or two hours.
A lot of hikers leave their big backpacks at the shelter and only take with them a small pack with water and snacks. I haven’t done it, but I’ve climbed up that rock wall with a heavy backpack more than once, and it’s not easy!

Once you reach the top, you’re rewarded with epic views of all the surrounding peaks, and even the coast and Africa can be seen on a clear day!
The way back is the same as you came. If you want to shave off a stretch on the way back, you can continue on the trail past Refugio Caldera and hike up the trail on the rock wall behind the shelter – you basically just walk straight ahead when descending Mulhacen.
Hiking to Mulhacen in 2 days from Capileira
I have not hiked all the way from Capileira to Mulhacen, and I’m not familiar with the trailhead and the way up to Refugio de Poqueira from there, but I wanted to mention it here so you know of the option.
The hike from Capileira is popular, though it has an elevation of more than 2000 meters. Most people head to Refugio de Poqueira or Refugio Caldera for the night and walk up to Mulhacen in the morning.
You can either return down the same way or take the easier descent on the east ridge as described in both my one day hike and my two-day hike from Hoya del Portillo in this guide.
You can expect to hike for 10-11 hours on day two to get all the way back down to Capileira if you stay at Refugio de Poqueira and climb Mulhacen on day two.
When is the best time to climb Mulhacen
Mulhacen is best to hike between July and September when there’s less chance of snow but it can be done without a guide from late spring to early autumn.
You just need to check the weather conditions, especially if you plan on climbing the west ridge. This can be dangerous in snowy and icy conditions without adequate gear. Some years there’s snow as late as July, others it disappears in May.
It’s worth noting that the bus service from Capileira to Mirador de Trevelez only goes in the summer months.
Where to stay when hiking Mulhacen
Here are a few alternatives for where to stay in Capileira and Trevelez when you go hiking Mulhacen.
Capileira
If you take the bus to Mirador de Trevelez for a day hike or if you hike straight from Capileira, you definitely want to stay here. But even if you hike from Hoya del Portillo, it can be convenient to stay the night in Capileira.
Hotel Rural Real de Poqueira – This is a beautiful mountain hotel with astounding views in the center of the village. It has a pool in the summer, has a bar, and serves breakfast.
Hostal El Cascapeñas de la Alpujarra – In the main street in the village, you find this hotel with a roof terrace boasting spectacular views. There is a bar below serving breakfast and tapas.
Trevelez
If you opt for the Mulhacen hiking route from Trevelez, this is the place to stay. There are also a lot of other spectacular hiking routes from the village.
Hotel Rural Pepe Alvarez – This hotel is centrally situated in the village of Trevelez. It has rooms with mountain views, breakfast, and a bar.
Reflections on Mulhacen hiking
Mulhacen is one of the absolute must-do hikes in Andalucia and one the locals will respect you for climbing. There are so many different ways to conquer it in one day or several days. Some are hard while others are easier. Depending on your physical state (and mental), it might be harder or easier than what I experienced.
The absolute toughest part for me was definitely the climb up the west ridge of Mulhacen hiking from Puerto del Portillo. My backpack was super heavy and the top never seemed to get closer. But walking up from Refugio Caldera was a lot easier, and I was probably also in better physical shape when I did that.
Altogether, all the hikes I’ve done to reach Mulhacen have been memorable hikes that I totally loved doing and I recommend anyone who loves the mountains to try at least one of these routes.
Other hikes in Sierra Nevada:
- Pico de Veleta
- El Chullo
- Ruta de Los Cahorros
- Cascada del Goterón
- Rio Molinos
- Lavaderos de la Reina
- Siete Lagunas
I remember passing by the Mulhacen hike trailhead in Trevelez and resolutely decide to ignore it, hehe. Well, I wasn’t geared for a hike anyway. Instead, I went for a Mulhacen craft beer on the main square.
Thanks for this comprehensive post – now I know what to expect next time!
Awesome! I still haven’t had a Mulhacen beer;) But planning on a hike from Trevelez this summer, so I’ll update the post with more info then.
Hi thanks for the great post! This hike sounds really exciting but I wonder is that something we can do in end March? Cheers
Hey Aileen, As mentioned in the post, I don’t recommend going there before the snow melts unless you hike with a knowledgeable local guide providing the right gear. The skiing season is usually until April and the snow sometimes lasts until June-July. That said, you can always check if Sierra Nevada has live cams showing the snow level at nearby Pico Veleta. For March, I’d recommend other hikes in Granada, like Cahorros de Monachil or Vereda de la Estrella (only if there’s no snow – but this is much lower and it has mesmerizing views to the snow-capped 3000-meter peaks. You can read my complete hiking guides for these hikes here: https://andaluciahiking.com/hike-vereda-de-la-estrella-granada-sierra-nevada/ https://andaluciahiking.com/hiking-ruta-de-los-cahorros-monachil/
Hi, I would like to hike Mulhacen from Capileira, taking the Bus to Mirador de Trevelez on June 23 or June 24 do you think the bus will be running then? How do I make bus reservations and is that something I should be doing now? That is my time window to be there and I really to summit Mulhacen, so if the bus is not running would it be best to hike from Capileira or Trevelez? I plan to do a long day hike, not backpacking. Would there be a way to connect with other people that may want to day hike on that day. Any advice is much appreciated. — Tami
Hi Tami, I know people have tried to contact the visitor center in Capileira now in May, but they are not responding. By the end of June they are hopefully open, but it depends on the snow I think. We have usually booked a couple of days in advance and I see people show up in th emorning (there are several buses) but it might be full. I haven’t hiked all the way from Capileira, but I can say that from Trevelez it’s very steep and hard up to Siete Lagunas and I believe it’s less strenous from Capileira and shorter. For connecting with other hikers, I would try to look for Facebook groups maybe search for hiking groups in Sierra Nevada where you might find other people that want to do the hike on your dates. Good luck and happy hiking!
Hi
I’m trying to find information/time table for the Capileira to Mirador de Trevelez Bus.
Can you help please?
Thanks
Phil
Hi Phil, I don’t thing they open before after easter, but you can try either emailing pi.capileira.cma@juntadeandalucia.es or calling one of these numbers: 671 564 406 or 958 763 090 (with +34 first if you call from abroad). However, I’m not sure if anyone will respond before they open for the summer season. And of experience, emails and numbers to these institutions often change without warning. Wishing you good luck!
This is an amazing post, thank you so much <3
I’m glad you found it helpful:)